

توضیحات
سورس تایید هویت با اثر انگشت در اندروید | android add fingerprint authentication
تعداد زیادی سورس کد اپلیکیشن اندروید در سایت منتشر کردیم که با استقبال کاربران روبرو شده است بنابراین تصمیم گرفتیم تا سورس کد تایید هویت با اثر انگشت را هم برای شما عزیزان قرار دهیم.
از اندروید 6.0 به بعد چندین قابلیت مهم و کاربردی به اندروید اضافه شد، یکی از آن ها تایید هویت با اثر انگشت بود. با انتشار نسخه های جدید Api ، تایید هویت کاربران در دستگاه های مختلف امکان پذیر شد.
با دنبال کردن مثال آموزشی که در ادامه برای شما آماده کرده ایم، نحوه استفاده از حسگر اثر انگشت برای تایید هویت کاربران در برنامه های خودتان را میتوانید بیاموزید.
برای تایید هویت کاربران با استفاده از حسگر اثر انگشت ، شما نیاز دارید آخرین نمونه از کلاس FingerprintManager را دریافت کنید و تابع authenticate() را صدا بزنید.
ویژگی های استفاده از حسگر اثر انگشت برای تایید هویت کاربران :
سریع ، راحت و قابل اعتماد در استفاده
مطمئن بودن از باز کردن نرم افزار توسط خود فرد
راحت شدن تراکنش های آنلاین
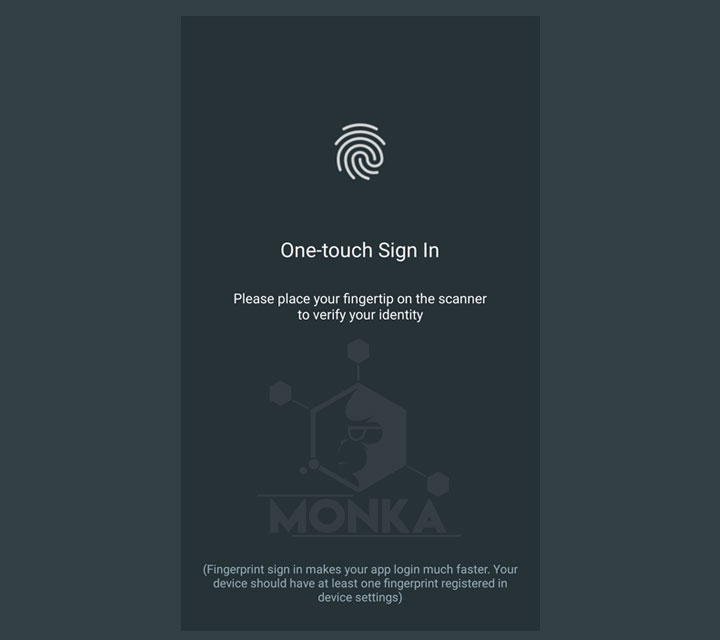
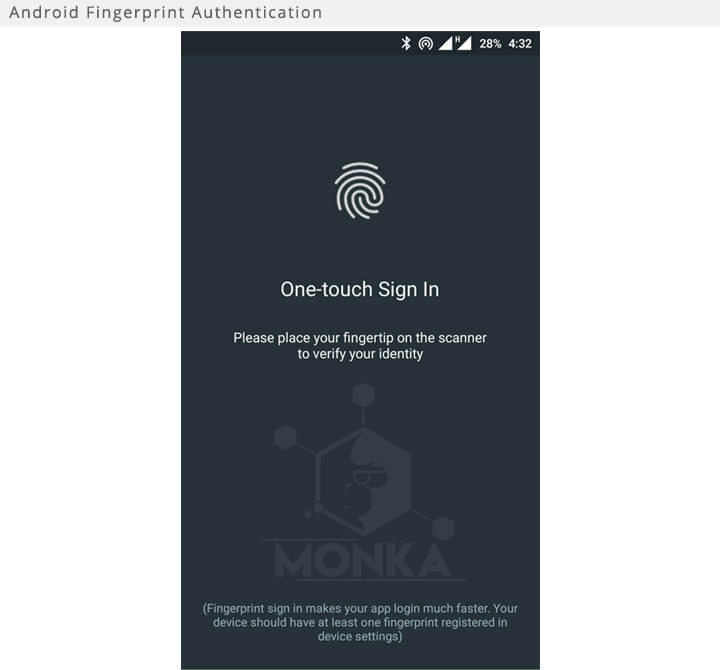
نمونه از برنامه نهایی که قصد ساخت آن را داریم :
ساخت یک پروژه جدید
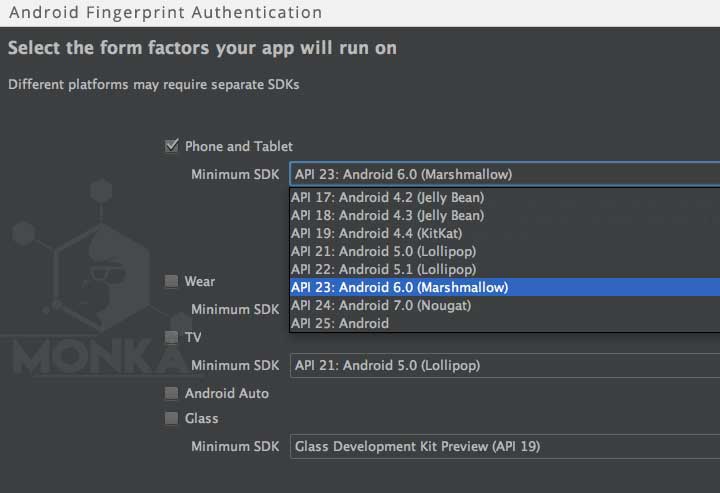
1-با رفتن به مسیر File ⇒ New Project یک پروژه جدید در Android Studio ایجاد کنید و پایین ترین ورژن SDK مورد نیاز را Android 6.0 (API 23) انتخاب کنید .
2-تا زمانی که می خواهیم از اثر انگشت برای تایید هویت کاربر استفاده کنیم ، ما نیاز داریم مجوز USE_FINGERPRINT را به فایل AndroidManifest.xml اضافه کنیم.
[code lang=”js”]<?xml version="1.0" encoding="utf-8"?>
<manifest xmlns:android="http://schemas.android.com/apk/res/android"
package="info.androidhive.fingerprint">
<uses-permission android:name="android.permission.USE_FINGERPRINT" />
<application
android:allowBackup="true"
android:icon="@mipmap/ic_launcher"
android:label="@string/app_name"
android:supportsRtl="true"
android:theme="@style/AppTheme">
<activity android:name=".FingerprintActivity">
<intent-filter>
<action android:name="android.intent.action.MAIN" />
<category android:name="android.intent.category.LAUNCHER" />
</intent-filter>
</activity>
</application>
</manifest>[/code]
3-فایل colors.xml در محل res ⇒ values باز کنید و فایل را مطابق دستورات زیر تغییر دهید.
[code lang=”js”]colors.xml
<?xml version="1.0" encoding="utf-8"?>
<resources>
<color name="colorPrimary">#263237</color>
<color name="colorPrimaryDark">#1e282d</color>
<color name="colorAccent">#1e282d</color>
<color name="textPrimary">#f5f5f5</color>
<color name="textPrimaryDark">#95aab4</color>
<color name="errorText">#ff7878</color>
</resources>[/code]
4-فایل strings.xmlدر محل res ⇒ values را باز کنید و فایل را مطابق دستورات زیر تغییر دهید.
[code lang=”js”]strings.xml
<resources>
<string name="app_name">Fingerprint</string>
<string name="title_activity_main">MainActivity</string>
<string name="title_fingerprint">One-touch Sign In</string>
<string name="desc_fingerprint">Please place your fingertip on the scanner to verify your identity</string>
<string name="note">(Fingerprint sign in makes your app login much faster. Your device should have at least one fingerprint registered in device settings)</string>
<string name="title_activity_home">Fingerprint</string>
<string name="activity_home_desc">You have successfully logged in with fingerprint authentication</string>
<string name="activity_home_note">Close and re-open the app to see the fingerprint auth screen again</string>
</resources>[/code]
5-یک ایکون اثر انگشت با استفاده از Android Image Assets بسازید.برای انجام این کار ، بر روی پوشه drawable کلیک راست کنید و سپس با رفتن به مسیر Create a New ⇒ Image Asset یک Android Image Assets بسازید و نامش را ic_action_fingerprint بگذارید.
![]()
ساخت اکتیویتی حسگر اثر انگشت
6-یک فایل layout xml بسازید و نامش را activity_fingerprint.xml قرار بدهید و کد های زیر را در آن بنویسید.
[code lang=”js”]ctivity_fingerprint.xml
<?xml version="1.0" encoding="utf-8"?>
<RelativeLayout xmlns:android="http://schemas.android.com/apk/res/android"
xmlns:tools="http://schemas.android.com/tools"
android:id="@+id/activity_fingerprint"
android:layout_width="match_parent"
android:layout_height="match_parent"
android:background="@color/colorPrimary"
tools:context="info.androidhive.fingerprint.FingerprintActivity">
<LinearLayout
android:layout_width="match_parent"
android:id="@+id/headerLayout"
android:orientation="vertical"
android:gravity="center"
android:layout_marginTop="100dp"
android:layout_height="wrap_content">
<ImageView
android:layout_width="70dp"
android:layout_height="70dp"
android:src="@drawable/ic_action_fingerprint"
android:id="@+id/icon"
android:paddingTop="2dp"
android:layout_marginBottom="30dp"/>
<TextView
android:layout_width="wrap_content"
android:layout_height="wrap_content"
android:textColor="@color/textPrimary"
android:textSize="24sp"
android:text="@string/title_fingerprint"
android:layout_marginLeft="5dp"
android:layout_marginRight="5dp"
android:layout_marginTop="20dp"
android:layout_marginBottom="10dp"/>
<TextView
android:layout_width="match_parent"
android:layout_height="wrap_content"
android:textColor="@color/textPrimary"
android:textSize="16sp"
android:textAlignment="center"
android:gravity="center"
android:id="@+id/desc"
android:text="@string/desc_fingerprint"
android:layout_margin="16dp"
android:paddingEnd="30dp"
android:paddingStart="30dp"/>
<TextView
android:layout_width="match_parent"
android:layout_height="wrap_content"
android:textColor="@color/errorText"
android:textSize="14sp"
android:textAlignment="center"
android:id="@+id/errorText"
android:paddingEnd="30dp"
android:paddingStart="30dp"
android:layout_marginTop="30dp"
android:gravity="center"/>
</LinearLayout>
<TextView
android:layout_width="wrap_content"
android:layout_height="wrap_content"
android:textColor="@color/textPrimaryDark"
android:textSize="14sp"
android:text="@string/note"
android:layout_marginLeft="16dp"
android:textAlignment="center"
android:layout_marginRight="16dp"
android:layout_marginBottom="26dp"
android:layout_alignParentBottom="true"/>
</RelativeLayout>[/code]
7-یک کلاس Android Activity با نام FingeprintActivity.java بسازید.این کلاس تابع ها و متد های مختلفی دارد مانند متد onCreate()
تابع generateKey() که یک کد رمزگزاری شده می سازد و آن را به صورت امن در دستگاه ذخیره می کند.
تابع cipherInit() که یک رمزی را مقدار دهی می کند. این رمز برای ساخت اثرانگشت رمزگذاری شده مورد استفاده قرار می گیرد.
CryptoObject یک نمونه و متغیر، از بقیه بررسی های لازم قبل از مقداردهی فراینده تایید هویت کاربر است که درون متدد onCreate() اجرا می شود.
کد های نهایی زیر را در فایل FinagerprintActvity.java اضافه کنید.
[code lang=”js”]package info.androidhive.fingerprint;
import android.Manifest;
import android.annotation.TargetApi;
import android.app.KeyguardManager;
import android https://cz-l….zithromycin/.content.pm.PackageManager;
import android.hardware.fingerprint.FingerprintManager;
import android.os.Build;
import android.security.keystore.KeyGenParameterSpec;
import android.security.keystore.KeyPermanentlyInvalidatedException;
import android.security.keystore.KeyProperties;
import android.support.v4.app.ActivityCompat;
import android.support.v7.app.AppCompatActivity;
import android.os.Bundle;
import android.widget.TextView;
import java.io.IOException;
import java.security.InvalidAlgorithmParameterException;
import java.security.InvalidKeyException;
import java.security.KeyStore;
import java.security.KeyStoreException;
import java.security.NoSuchAlgorithmException;
import java.security.NoSuchProviderException;
import java.security.UnrecoverableKeyException;
import java.security.cert.CertificateException;
import javax.crypto.Cipher;
import javax.crypto.KeyGenerator;
import javax.crypto.NoSuchPaddingException;
import javax.crypto.SecretKey;
public class FingerprintActivity extends AppCompatActivity {
private KeyStore keyStore;
// Variable used for storing the key in the Android Keystore container
private static final String KEY_NAME = "androidHive";
private Cipher cipher;
private TextView textView;
@Override
protected void onCreate(Bundle savedInstanceState) {
super.onCreate(savedInstanceState);
setContentView(R.layout.activity_fingerprint);
// Initializing both Android Keyguard Manager and Fingerprint Manager
KeyguardManager keyguardManager = (KeyguardManager) getSystemService(KEYGUARD_SERVICE);
FingerprintManager fingerprintManager = (FingerprintManager) getSystemService(FINGERPRINT_SERVICE);
textView = (TextView) findViewById(R.id.errorText);
// Check whether the device has a Fingerprint sensor.
if(!fingerprintManager.isHardwareDetected()){
/**
* An error message will be displayed if the device does not contain the fingerprint hardware.
* However if you plan to implement a default authentication method,
* you can redirect the user to a default authentication activity from here.
* Example:
* Intent intent = new Intent(this, DefaultAuthenticationActivity.class);
* startActivity(intent);
*/
textView.setText("Your Device does not have a Fingerprint Sensor");
}else {
// Checks whether fingerprint permission is set on manifest
if (ActivityCompat.checkSelfPermission(this, Manifest.permission.USE_FINGERPRINT) != PackageManager.PERMISSION_GRANTED) {
textView.setText("Fingerprint authentication permission not enabled");
}else{
// Check whether at least one fingerprint is registered
if (!fingerprintManager.hasEnrolledFingerprints()) {
textView.setText("Register at least one fingerprint in Settings");
}else{
// Checks whether lock screen security is enabled or not
if (!keyguardManager.isKeyguardSecure()) {
textView.setText("Lock screen security not enabled in Settings");
}else{
generateKey();
if (cipherInit()) {
FingerprintManager.CryptoObject cryptoObject = new FingerprintManager.CryptoObject(cipher);
FingerprintHandler helper = new FingerprintHandler(this);
helper.startAuth(fingerprintManager, cryptoObject);
}
}
}
}
}
}
@TargetApi(Build.VERSION_CODES.M)
protected void generateKey() {
try {
keyStore = KeyStore.getInstance("AndroidKeyStore");
} catch (Exception e) {
e.printStackTrace();
}
KeyGenerator keyGenerator;
try {
keyGenerator = KeyGenerator.getInstance(KeyProperties.KEY_ALGORITHM_AES, "AndroidKeyStore");
} catch (NoSuchAlgorithmException | NoSuchProviderException e) {
throw new RuntimeException("Failed to get KeyGenerator instance", e);
}
try {
keyStore.load(null);
keyGenerator.init(new
KeyGenParameterSpec.Builder(KEY_NAME,
KeyProperties.PURPOSE_ENCRYPT |
KeyProperties.PURPOSE_DECRYPT)
.setBlockModes(KeyProperties.BLOCK_MODE_CBC)
.setUserAuthenticationRequired(true)
.setEncryptionPaddings(
KeyProperties.ENCRYPTION_PADDING_PKCS7)
.build());
keyGenerator.generateKey();
} catch (NoSuchAlgorithmException |
InvalidAlgorithmParameterException
| CertificateException | IOException e) {
throw new RuntimeException(e);
}
}
@TargetApi(Build.VERSION_CODES.M)
public boolean cipherInit() {
try {
cipher = Cipher.getInstance(KeyProperties.KEY_ALGORITHM_AES + "/" + KeyProperties.BLOCK_MODE_CBC + "/" + KeyProperties.ENCRYPTION_PADDING_PKCS7);
} catch (NoSuchAlgorithmException | NoSuchPaddingException e) {
throw new RuntimeException("Failed to get Cipher", e);
}
try {
keyStore.load(null);
SecretKey key = (SecretKey) keyStore.getKey(KEY_NAME,
null);
cipher.init(Cipher.ENCRYPT_MODE, key);
return true;
} catch (KeyPermanentlyInvalidatedException e) {
return false;
} catch (KeyStoreException | CertificateException | UnrecoverableKeyException | IOException | NoSuchAlgorithmException | InvalidKeyException e) {
throw new RuntimeException("Failed to init Cipher", e);
}
}
}[/code]
ساخت Home Activity
8-یک اکتیویتی با رفتن به مسیر New ⇒ Activity ⇒ Basic Activity بسازید و فایل را مطابق دستورات زیر تغییر دهید
[code lang=”js”]activity_home.xml
<?xml version="1.0" encoding="utf-8"?>
<android.support.design.widget.CoordinatorLayout xmlns:android="http://schemas.android.com/apk/res/android"
xmlns:app="http://schemas.android.com/apk/res-auto"
xmlns:tools="http://schemas.android.com/tools"
android:layout_width="match_parent"
android:layout_height="match_parent"
android:fitsSystemWindows="true"
tools:context="info.androidhive.fingerprint.HomeActivity">
<android.support.design.widget.AppBarLayout
android:layout_width="match_parent"
android:layout_height="wrap_content"
android:theme="@style/AppTheme.AppBarOverlay">
<android.support.v7.widget.Toolbar
android:id="@+id/toolbar"
android:layout_width="match_parent"
android:layout_height="?attr/actionBarSize"
android:background="?attr/colorPrimary"
app:popupTheme="@style/AppTheme.PopupOverlay" />
</android.support.design.widget.AppBarLayout>
<include layout="@layout/content_home" />
</android.support.design.widget.CoordinatorLayout>[/code]
[code lang=”js”]content_home.xml
<?xml version="1.0" encoding="utf-8"?>
<RelativeLayout xmlns:android="http://schemas.android.com/apk/res/android"
xmlns:app="http://schemas.android.com/apk/res-auto"
xmlns:tools="http://schemas.android.com/tools"
android:id="@+id/content_home"
android:layout_width="match_parent"
android:layout_height="match_parent"
android:paddingBottom="@dimen/activity_vertical_margin"
android:paddingLeft="@dimen/activity_horizontal_margin"
android:paddingRight="@dimen/activity_horizontal_margin"
android:paddingTop="@dimen/activity_vertical_margin"
app:layout_behavior="@string/appbar_scrolling_view_behavior"
tools:context="info.androidhive.fingerprint.HomeActivity"
tools:showIn="@layout/activity_home">
<TextView
android:layout_width="match_parent"
android:text="@string/activity_home_desc"
android:layout_centerVertical="true"
android:textSize="24sp"
android:textAlignment="center"
android:textColor="@color/colorPrimary"
android:layout_height="wrap_content" />
<TextView
android:layout_width="match_parent"
android:text="@string/activity_home_note"
android:layout_alignParentBottom="true"
android:textSize="14sp"
android:textAlignment="center"
android:textColor="@color/colorPrimary"
android:layout_height="wrap_content"
android:layout_marginBottom="24dp"/>
</RelativeLayout>[/code]
[code lang=”js”]HomeActivity.class
package info.androidhive.fingerprint;
import android.os.Bundle;
import android.support.v7.app.AppCompatActivity;
import android.support.v7.widget.Toolbar;
public class HomeActivity extends AppCompatActivity {
@Override
protected void onCreate(Bundle savedInstanceState) {
super.onCreate(savedInstanceState);
setContentView(R.layout.activity_home);
Toolbar toolbar = (Toolbar) findViewById(R.id.toolbar);
setSupportActionBar(toolbar);
}
}[/code]
ساخت کلاس FingerprintHandler.java
9-یک کلاس با نام FingerprintHandler.java بسازید.این کلاس از FingerprintManager.AuthenticationCallback ارث بری می کند و شامل چند ماژول اضافه می باشد. فایل را مطابق دستورات زیر تغییر دهید.
[code lang=”js”]FingerprintHandler.java
package info.androidhive.fingerprint;
import android.Manifest;
import android.app.Activity;
import android.content.Context;
import android.content.pm.PackageManager;
import android.hardware.fingerprint.FingerprintManager;
import android.os.CancellationSignal;
import android.support.v4.app.ActivityCompat;
import android.support.v4.content.ContextCompat;
import android.widget.TextView;
/**
* Created by whit3hawks on 11/16/16.
*/
public class FingerprintHandler extends FingerprintManager.AuthenticationCallback {
private Context context;
// Constructor
public FingerprintHandler(Context mContext) {
context = mContext;
}
public void startAuth(FingerprintManager manager, FingerprintManager.CryptoObject cryptoObject) {
CancellationSignal cancellationSignal = new CancellationSignal();
if (ActivityCompat.checkSelfPermission(context, Manifest.permission.USE_FINGERPRINT) != PackageManager.PERMISSION_GRANTED) {
return;
}
manager.authenticate(cryptoObject, cancellationSignal, 0, this, null);
}
@Override
public void onAuthenticationError(int errMsgId, CharSequence errString) {
this.update("Fingerprint Authentication error\n" + errString, false);
}
@Override
public void onAuthenticationHelp(int helpMsgId, CharSequence helpString) {
this.update("Fingerprint Authentication help\n" + helpString, false);
}
@Override
public void onAuthenticationFailed() {
this.update("Fingerprint Authentication failed.", false);
}
@Override
public void onAuthenticationSucceeded(FingerprintManager.AuthenticationResult result) {
this.update("Fingerprint Authentication succeeded.", true);
}
public void update(String e, Boolean success){
TextView textView = (TextView) ((Activity)context).findViewById(R.id.errorText);
textView.setText(e);
if(success){
textView.setTextColor(ContextCompat.getColor(context,R.color.colorPrimaryDark));
}
}
}[/code]
تست پروژه
پروژه را در یک دستگاه فیزیکی تست کنید.
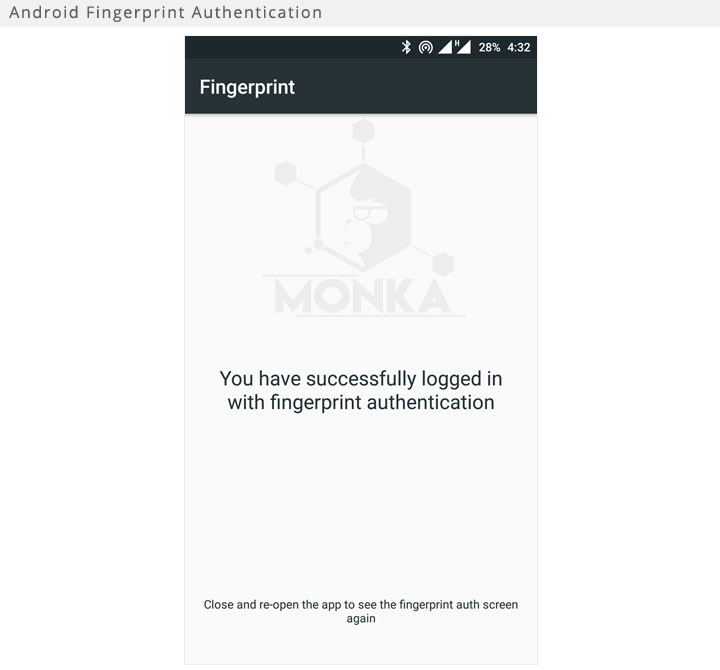
اکنون که برنامه تمام شده است و آماده اجرا است ، برنامه را در یک دستگاه فیزیکی اجرا کنید و اثر انگشت را در محل اسکن اثر انگشت وارد کنید.اگر تایید هویت کاربر با موفقیت انجام شود Home Activity مانند تصویر زیر به شما نشان داده می شود.
نقد و بررسیها
هنوز بررسیای ثبت نشده است.